You might not think about them often, but they play a vital role in protecting your home from water damage and ensuring your asphalt shingle roof stays in top shape. In this blog post, we’re going to explore three common roof drip edge types and cover everything you need to know about them.
What’s inside this blog:
- Basic overview of a roof drip edge
- The 3 types of roof drip edges, including their shape, installation method, & benefits
- 5 tips for installing + maintaining your roof drip edge
Ready to become a pro at all-things-roof-drips?! Read on!
What’s a Roof Drip Edge, Anyway?
Before we jump into the types, let’s get back to basics. What exactly is a roof drip edge? Well, it’s a piece of metal (typically aluminum or galvanized steel) that’s installed along the edges of your roof. Its primary job is to:
- Direct Water Away: The drip edge helps channel rainwater away from your roof’s edge, preventing water from seeping into vulnerable areas.
- Protect Fascia and Soffit: By preventing water damage to the fascia (the board behind your gutter) and soffit (the underside of your roof’s overhang), it keeps these areas safe and sound.
- Extend Roof Life: It can prolong the life of your roof by preventing water-related issues that could lead to costly repairs.
We’ll dive further into each of these job functions later in this blog when we cover the roof drip edges’ benefits.
Type 1: L-Shaped Drip Edge
This is the most common type of drip edge you’ll encounter. Known for its versatility, it’s like the Swiss Army knife of roof edges.
- Shape 🔺: It’s named L-shaped for its appearance, with one long leg that goes under the shingles and one short leg that hangs over the edge.
- Installation 🛠️ : Installed along the eaves (the bottom edge of your roof) and the gables (the sloping sides of your roof).
- Benefits ➕: Provides excellent protection against water infiltration and prevents wind-driven rain from getting under the shingles.
Type 2: T-Shaped Drip Edge
The T-shaped drip edge is a bit more specialized and unique. It’s also often used in conjunction with gutters.
- Shape 🔺: As the name suggests, it forms a T shape, with one horizontal section that goes under the shingles and a vertical section that extends down the fascia.
- Installation 🛠️ : Typically installed at the eaves, where it helps direct water into the gutters, ensuring efficient drainage.
- Benefits ➕: Works in harmony with gutters to channel rainwater away from your home’s foundation, preventing potential water damage.
Type 3: Drip Edge with a Kick Out Flange 🦵
This one’s like the ninja of drip edges, with a special move to combat water damage at wall intersections.
- Shape 🔺: Similar to the L-shaped drip edge but with an extra kick out flange at the bottom.
- Installation 🛠️ : Used where the roof meets a wall, specifically at roof-wall intersections.
- Benefits ➕: Prevents water from running down the wall and seeping into vulnerable areas by directing it into the gutter system.
Here’s Why Roof Drip Edges Matter
Now that you know the types, you might be wondering why these unassuming pieces of metal are so important. Let’s break down their benefits.
They Prevent Water Damage 🌊
Water can be a roof’s worst enemy, and a well-installed drip edge serves as a sturdy barrier against its intrusion. When rainwater runs down your roof, it’s channeled into your gutters by the drip edge. Without this crucial component, water can seep beneath your shingles, making its way into your roof’s underlayment and structure. Down the road, this can lead to:
- Rot: Moisture accumulation can cause the wooden components of your roof to rot. This weakens the structure and compromises its integrity.
- Mold and Mildew: Moist conditions beneath your roof create an ideal environment for mold and mildew growth. Besides being unsightly, mold can pose health risks to your household.
- Ceiling Stains: Water that infiltrates your roof can eventually make its way to your ceilings, causing unsightly stains and damage.
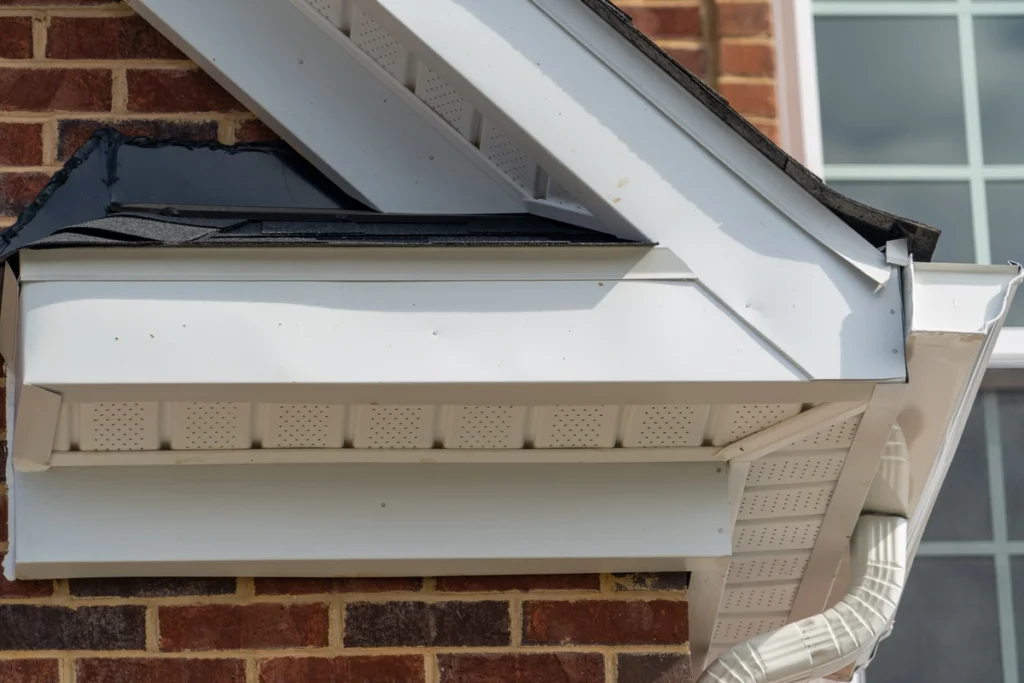
They Shield Your Fascia and Soffit 🪵
The fascia and soffit are often overlooked but play essential roles in your home’s well-being. The fascia is the board running horizontally behind your gutter, while the soffit is the underside of your roof’s overhang. These components provide structural support and ventilation for your home, making them vital for its longevity.
This said, they are particularly susceptible to water damage if not adequately protected. Without a drip edge, water can wick up from the roof’s edge, saturating the fascia and soffit. Over time, this can lead to wood rot and pest infestations, which can be a nightmare to deal with.
They Extend Your Roof’s Life ⏳
Roof replacement is a significant investment that most homeowners hope to delay for as long as possible. A well-functioning drip edge can contribute to prolonging the life of your roof.
Here’s how:
- Preserving Roof Deck: When water infiltrates your roof’s underlayment and deck, it can lead to rot and degradation. A drip edge prevents this water damage, preserving the integrity of your roof’s structure.
- Preventing Shingle Damage: Over time, moisture infiltration can cause your shingles to deteriorate prematurely. By keeping water away from your roof’s edge, a drip edge helps maintain the condition of your shingles.
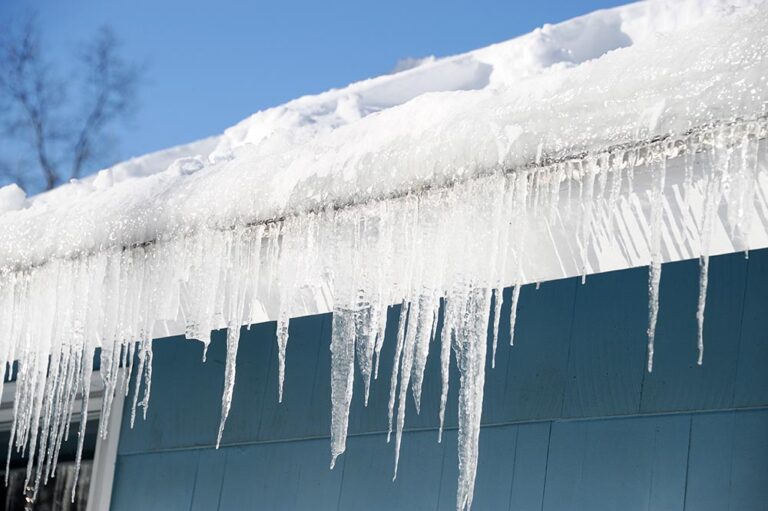
- Minimizing Ice Dams: In colder climates, ice dams can form when heat from your home melts snow on your roof, causing it to refreeze at the eaves. A properly installed drip edge can mitigate this issue, reducing the risk of ice dams and their associated damage.
Boost Your Home’s Aesthetics 🏠
Curb appeal matters, and the aesthetics of your roof contribute to the overall visual appeal of your home. Drip edges, although often overlooked, are essential for achieving a polished and finished appearance. This is because they create clean, sharp lines along the roof’s edge, providing a neat and tidy look.
5 Tips for Installing and Maintaining Your Drip Edge
Now that you appreciate the importance of roof drip edges, below we’ve provided some tips for effective installation and maintenance.
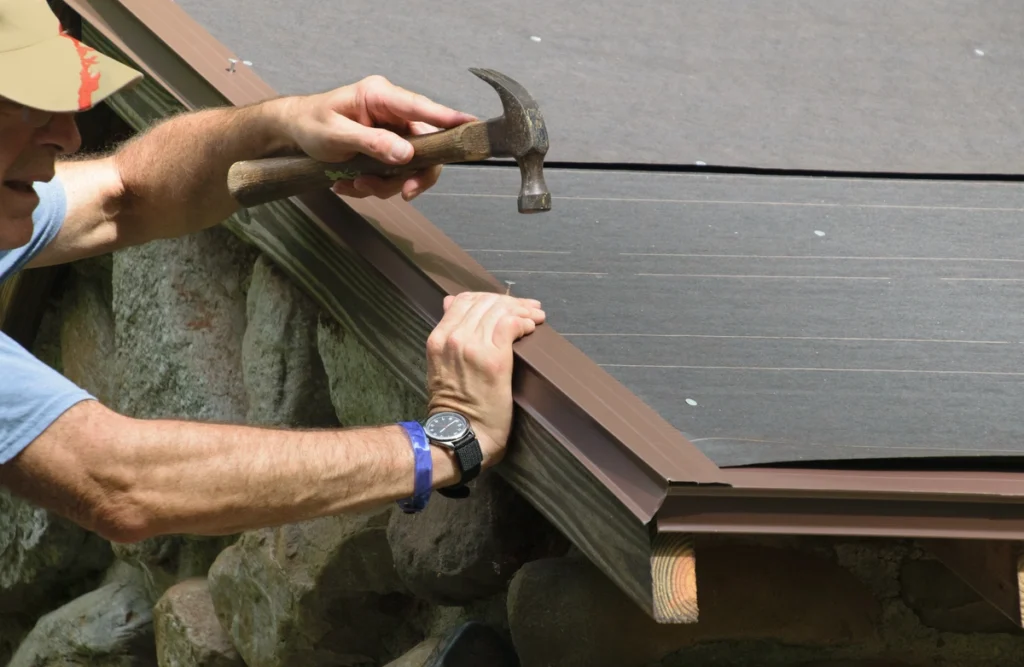
1. Professional Installation is Key 🔑
While you might be tempted to DIY, it’s best to leave the installation to the pros. Improperly installed drip edges can do more harm than good.
2. Check for Damage 🕵️♂️
Regularly inspect your drip edge for damage, rust, or loose sections. Address any issues promptly to ensure it continues to do its job effectively.
3. Keep Gutters Clean 🍂
If you have gutters, make sure they are clean and free of debris. Clogged gutters can compromise the effectiveness of your drip edge.
4. Consider Regular Roof Inspections 👀
Include drip edge inspection as part of your routine roof maintenance. A professional roof inspection can catch and address any issues early.
5. Choose the Right Material 🏠
Drip edges are typically made of aluminum or galvanized steel. Consult with a roofing professional to determine the best material for your climate and roof type.
Get the Right Roof Drip Edge for Your Home
Roof drip edges may not steal the spotlight, but they’re undoubtedly essential for protecting your home. Whether it’s the trusty L-shaped, the helpful T-shaped, or the ninja-like kickout flange type, roof drip edge types play a vital role in keeping your roof and home safe from water damage.
Reach out to our team of top-notch roofers at Andes Roofing to get a free quote on your next roofing project, or to ask us any questions about your roofing needs!