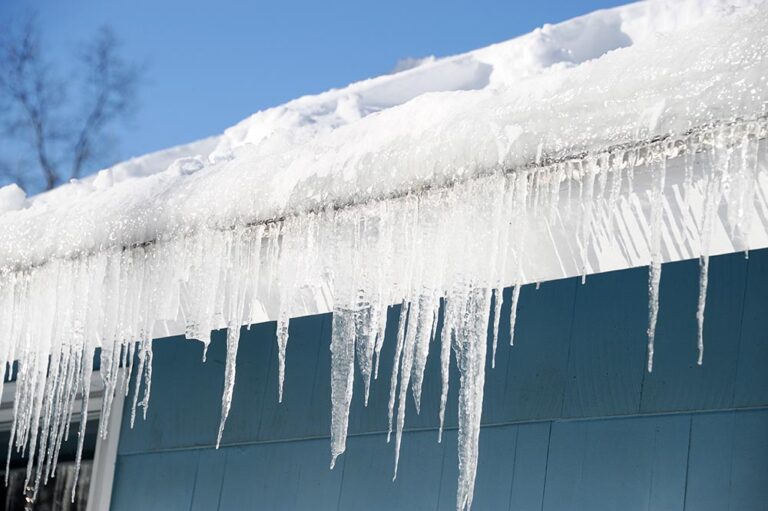
It’s no secret that Mother Nature can throw some pretty wild curveballs our way. One moment, you’re enjoying a sunny day, and the next, a fierce windstorm comes swooping in. While you might love a cool breeze on a hot summer day, the wind can sometimes bring unwanted surprises – like roof damage.
But don’t start pulling out your hair just yet! Dealing with roof damage from wind isn’t the end of the world. In fact, your homeowner’s insurance can often come to the rescue. We’ll guide you through the process of filing an insurance claim for roof damage caused by wind, so you can get your home back in tip-top shape without breaking the bank.
In this article, we’ll give you the inside scoop on:
- How to properly understand your insurance policy.
- How to file an insurance claim after your roof gets damaged by wind.
- The best tips + tricks for navigating the claims process.
Keep reading to become an expert in filing an insurance claim for roof damage.
Understanding Your Insurance Policy 📜

Before we dive into the nitty-gritty details, it’s essential to understand your homeowner’s insurance policy. Different policies cover different types of damage, so the first step is to review your policy documents carefully. Here are some key things to look for:
- Coverage Details: Check what types of damage are covered. Wind damage to roofs is typically covered, but specifics may vary.
- Deductible: Know your deductible amount – the amount you’ll need to pay out of pocket before your insurance kicks in.
- Policy Limit: Ensure that your claim doesn’t exceed your policy’s maximum coverage limit.
- Reporting Timeframe: Familiarize yourself with the time limits for reporting claims. Timeliness is crucial!
Once you’ve got your policy details squared away, it’s time to assess the damage.
Assess the Roof Damage 🏠
The wind has done its thing, and now you’re left with a potentially damaged roof.
Here’s how to assess the situation:
- Safety First: Safety should be your top priority. Don’t climb onto your roof if it’s steep or dangerous. Binoculars can be handy for a preliminary inspection.
- Inspect the Shingles: Check for missing, cracked, or curled shingles. Wind can lift them, leaving your roof vulnerable.
- Gutter Check: Examine your gutters and downspouts for granules from the shingles. An excessive amount might indicate roof damage.
- Interior Inspection: Look for water stains or leaks on your ceiling. These could be signs of hidden roof damage.
- Document Everything: Take photos and videos of the damage. Visual evidence will be crucial for your insurance claim.
Now that you’ve assessed the damage, it’s time to contact your insurance company.
File Your Insurance Claim Like a Pro 📞

Filing an insurance claim can be a bit intimidating, but it’s a necessary step to get the help you need.
Here’s what you should do:
- Contact Your Insurance Company: Reach out to your insurance company as soon as possible. They’ll guide you through the process and may even recommend a preferred contractor.
- Provide Documentation: Send over the photos and videos you took during your damage assessment. The more evidence you have, the smoother the claim process will be.
- Get an Estimate: Your insurer may send an adjuster to assess the damage in person. You can also obtain a repair estimate from a trusted roofing contractor. Having multiple estimates can be helpful.
- Review Your Policy: Go over the coverage details with your insurance company to ensure you’re both on the same page regarding what’s covered.
- File the Claim: Complete any necessary claim forms and submit them promptly. Be sure to keep copies for your records.
Navigate the Claims Process With Confidence 🔄
So, what happens next?
Here’s a rough overview of what you can expect during the claims process:
- Claim Investigation: Your insurance company will investigate your claim, reviewing the documentation and assessment reports.
- Adjuster Visit: If an adjuster hasn’t visited already, they may schedule a visit to inspect the damage in person.
- Claim Approval: Once your claim is approved, your insurance company will provide details about the coverage and payout.
- Repair or Replacement: With the approval in hand, you can proceed with repairs or replacement. Be sure to keep all receipts and invoices for reimbursement.
- Deductible Payment: Don’t forget that you’ll need to pay your deductible before your insurance kicks in.
Tips and Tricks for a Smooth Claim Process 🌟
Filing an insurance claim can sometimes feel like a maze with no way out.
So here are some tips to keep things running smoothly:
- Document Everything: We can’t stress this enough. Photos, videos, receipts – keep a paper trail of all communication and transactions related to your claim.
- Get Multiple Quotes: Don’t settle for the first estimate you receive. Get quotes from different contractors to ensure you’re getting a fair deal.
- Stay in Touch: Keep open lines of communication with your insurance company and the contractors you hire. It’s essential to be reachable throughout the process.
- Review Your Policy Annually: As your needs change, your insurance policy may need to change too. Review it annually to ensure you’re adequately covered.
- Consider Preventative Measures: After your repairs are complete, think about investing in wind-resistant roofing materials or reinforcement to minimize future damage.
Breeze Through Roof Damage Claims
While wind damage to your roof can be a headache, it’s reassuring to know that your homeowner’s insurance is there to help when disaster strikes. Now that you know how to file an insurance claim for roof damage from wind, you can breeze through the claims process with confidence.
Remember, safety first! Don’t attempt risky DIY fixes – leave the heavy lifting to the professionals. At Andes Roofing, our expert team is always happy to help you out and ensure your roof is top-notch condition. Contact us to schedule an appointment today.